OK. A few notes before I go forward with this entry:
- I have changed warps on you. I am using yarn that I spun a couple years ago for the project you are about to see. I didn’t want anyone thinking that weaving had the magical power to turn fingering weight purple silk into worsted weight handspun blue/green/purple mohair and romney.
- The information here is not intended to be a complete course in weaving. Far from it. But it should give you an idea of what is done, and maybe encourage you to learn some more. The best beginning weaving book that I have found is Learning to Weave by Deborah Chandler. Highly recommended.
- A reminder that this is just the way I normally do things. It is not the only way to skin the cat. (No offense to the cat lovers out there.) I say this because I am about to show you how I put a warp on the loom, and this is something that some people get very passionate about.
On with the show!
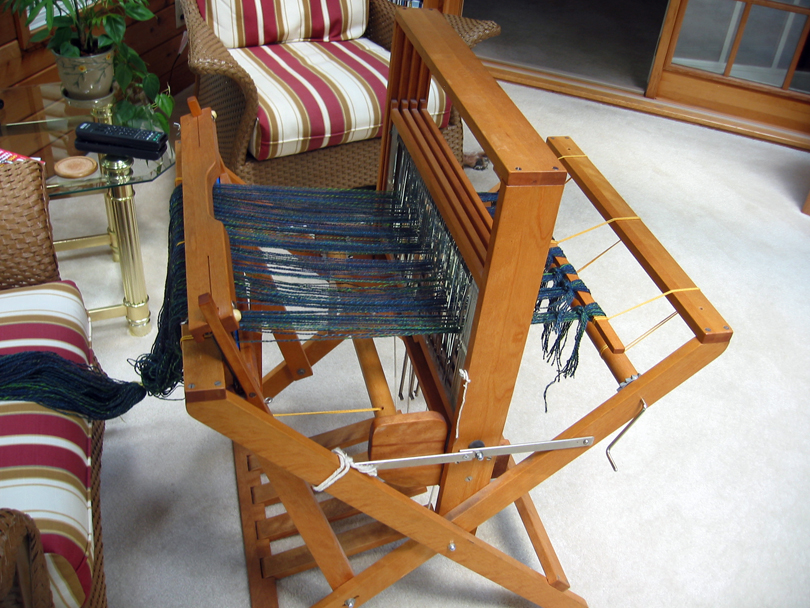
I warp a loom from front to back, meaning that I sley the reed first, then thread the heddles, and then tie the warp onto the back beam and beam the warp onto the loom. The other major way of warping a loom is from back to front, where the warp is put onto the back beam and beamed on, the heddles are threaded, and the reed is sleyed. That is about as much as I am going to say about the back to front method, because I rarely do it. A lot of what you will see here is transferable to that method, though there are some subtle, and not so subtle, differences between the two methods. The book that I mentioned earlier covers both methods; and these are not the only two methods for warping a loom, just to complicate things a bit for you. But for the most part, you really only need one method; so here is mine.
I. Sleying the reed
The reed is kind of like a giant comb, but its purpose is to keep the warp yarn spread out to the desired width when weaving, not to detangle the yarn. (If your warp yarn is tangled, you need to fix that pronto.) In another entry, you will see how the reed, as part of the loom’s beater, is used to put the weft yarn into its place during the actual weaving.
Putting the warp yarn through the reed is called sleying, and it is a pretty easy thing to do.
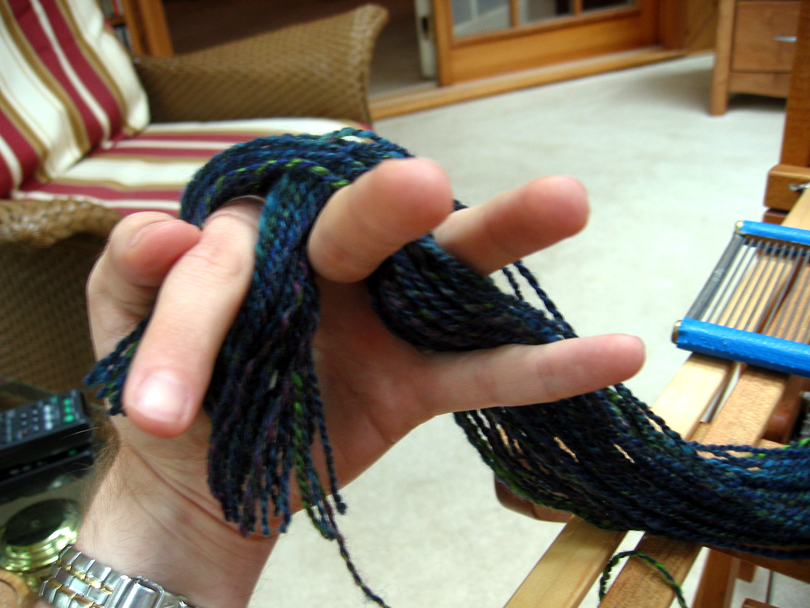
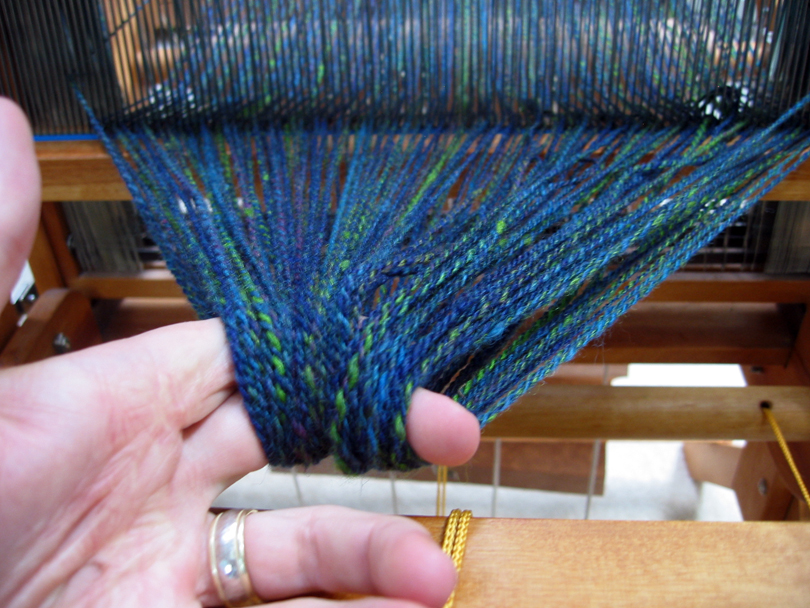
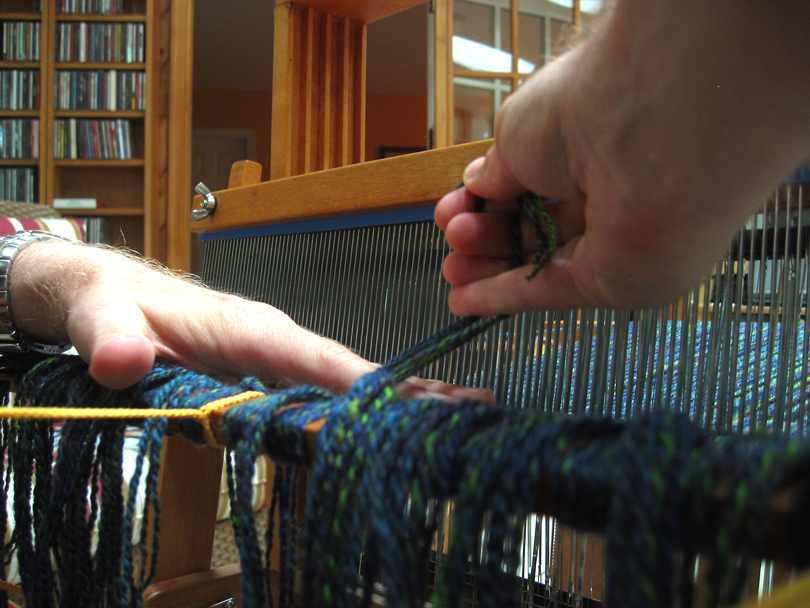
Here, I am holding the cross that I had in my warp. Once my fingers are in there, I can take out the choke ties that helped preserve the cross and cut the loop at the end of all of the warp threads so that I can begin sleying. The cross in the warp makes it very easy for me to pick out the warp threads, one by one, to sley the reed.
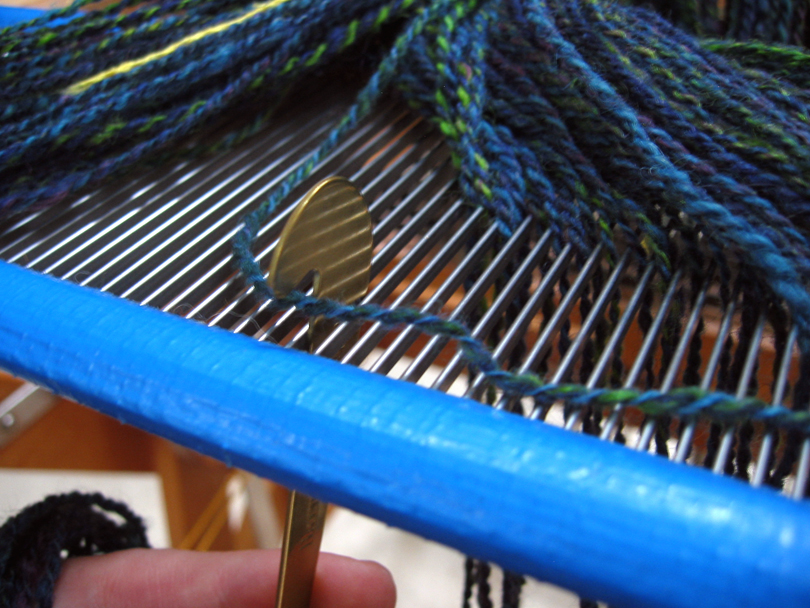
This is the actual act of sleying: putting the sley hook up through one of the openings (called a dent) in the reed and pulling a warp thread through the dent. That is all there is to it.
But how do I know how many threads go in each dent and which dents get threads? Well, the spacing of the dents for a reed is noted in dents per inch (DPI.) The reed that I am using here is 6 DPI. The warp spacing for this project is 8 EPI, so every 6 dents in the reed need to contain 8 warp threads. I sleyed the threads like this: 1-2-1-1-2-1. If you would rather not do the math for this, there are charts available to figure it out.
I am done sleying the reed and have put the reed into the loom’s beater. If you notice, I did try to keep the warp centered in the reed. In general, through this whole process, you want to keep the warp centered on the loom, though you don’t have to be too particular about. The reason for this is that if you do enough projects that favor one side of the loom over the other, your loom might become out of square (the front and back are no longer parallel,) and you will have problems with tension and such over time.
II. Threading the heddles
Like to thread the eyes of needles? Good! Because that is what basically going on here.
Heddles are what carry each warp thread up and down as part of the action of weaving. The heddles are carried on a shaft or harness of a loom, so that as a shaft is moved up or down, so are the heddles on that shaft, and thus the warp threads that are through those heddles. For most designs, each heddle gets one warp thread through it. Putting more than one thread through a heddle will cause all of those warp threads to act as one thread.
Here, I have started threading the heddles for my project. Working from right to left, I take a thread that has been sleyed through the reed and thread it through a heddle on the loom, taking care not to cross threads when going for reed to heddle. Crossing threads will cause problems with the up and down action of the warp threads when the actual weaving begins. It can be fixed later on, but it is best to take care and not make the mistake to begin with.
How do I know which heddle to thread when? I follow a chart called a drawdown. Here is the drawdown that I used for the last scarf that I wove:
Those black dots at the top tell me what heddle that I have to thread on which shaft in order to achieve that particular design. (Note: this is not the design that I am using this time out.)
Now, I have all of the heddles threaded. Time to tie the warp onto the back beam.
III. Tying on to back beam
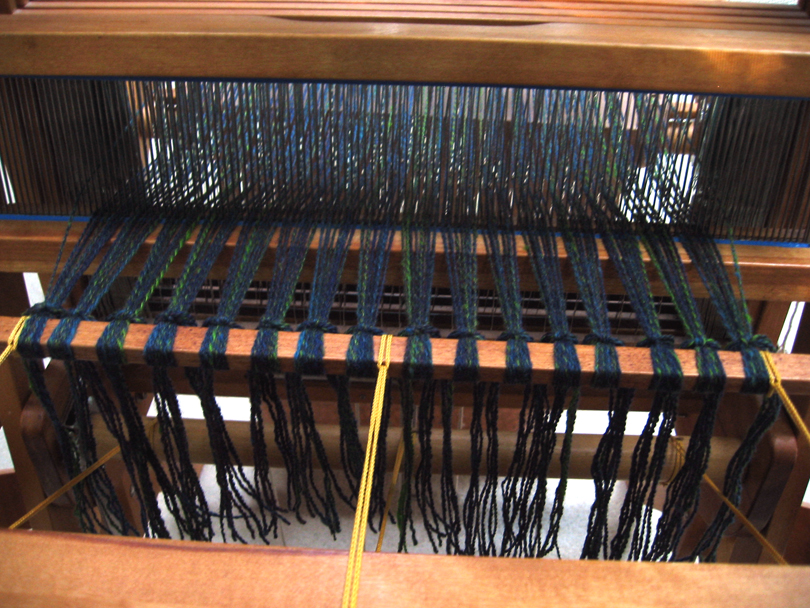
Tying on to the back beam is pretty easy. The idea here is to spread the warp threads far enough apart on the back beam so that the warp will go onto the back beam easily without any tension problems. Because of this, I don’t want to just take all of the warp threads and tie them all at once onto the back beam with just one big knot. I do it in several smaller, even bouts of threads.
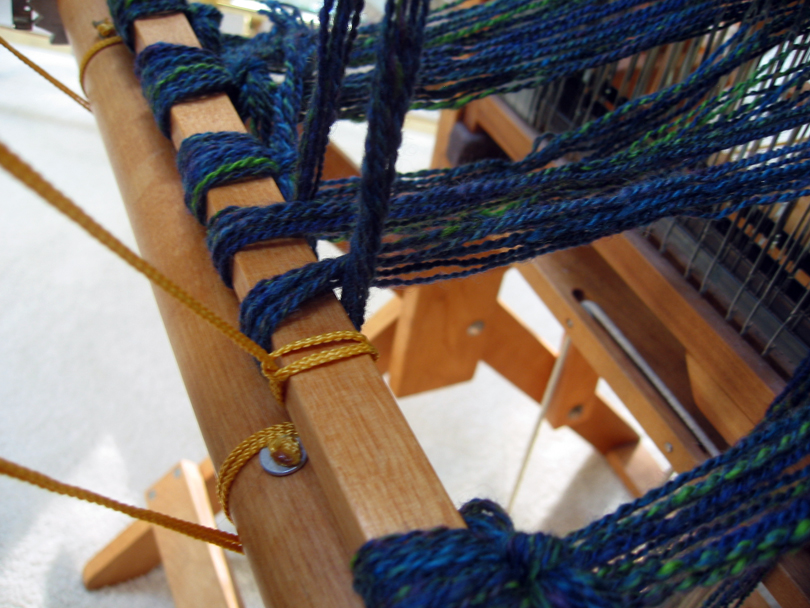
To do the actual tie on, I take the group of warp threads to be tied on and divide in half. Take each half and go around the rod that is attached to the back beam, going over, then under, and up on either side of those same warp threads. Tie a square knot here.
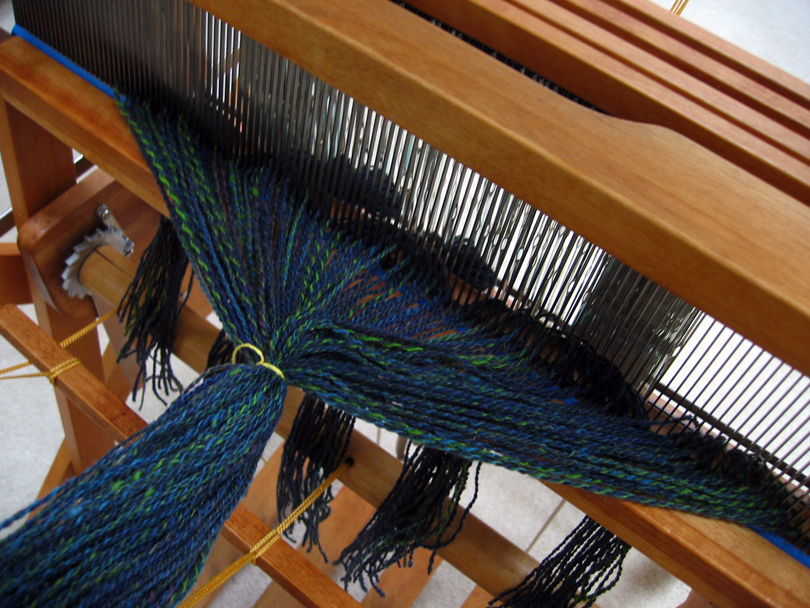
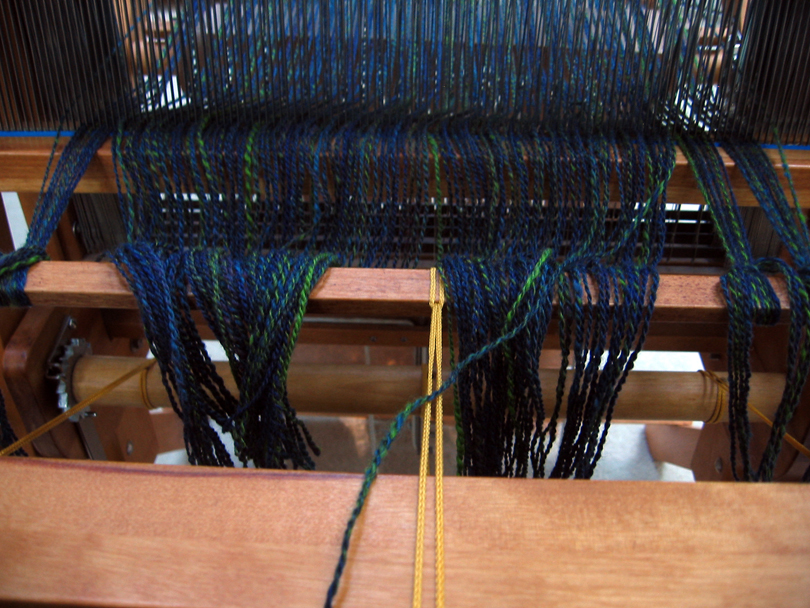
Once all of the warp threads are tied on the back, it will look like the photo above. Now, it is time to get all of that warp thread on the back beam.
IV. Beaming the warp
This is where I actually need to “get a feel” for the yarn. This is because I want every warp thread to be wound on the the back beam under the same tension as every other warp thread. To do this, I need to watch and feel the warp thread as it is beamed onto the loom.
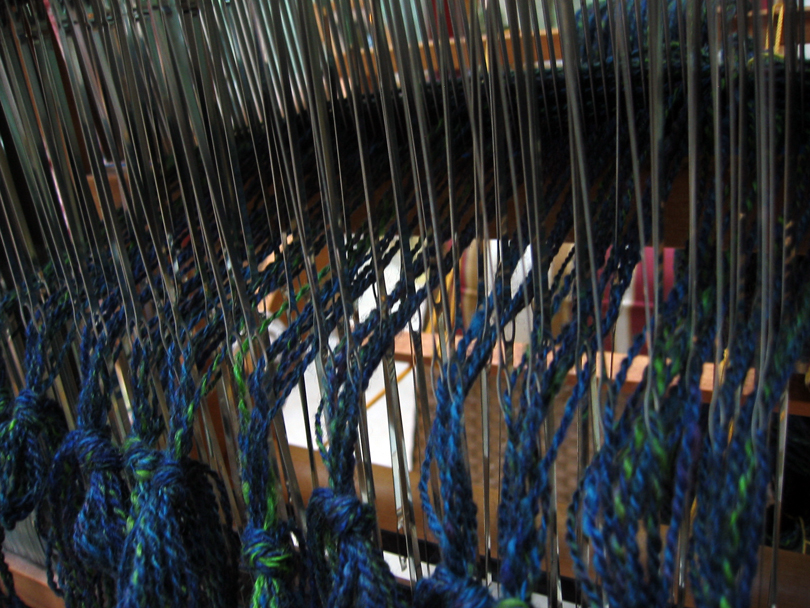
I start the beaming by removing some of the choke ties from the warp at the front of the loom and bring the beater all of the way forward. The beater, along with the heddles, separate the warp threads and also act as baffles while beaming on the warp, helping to even out the tension along the warp threads as they get put on the back. With the loom in this position, I start turning the crank on the back beam to wind the warp onto the back beam.
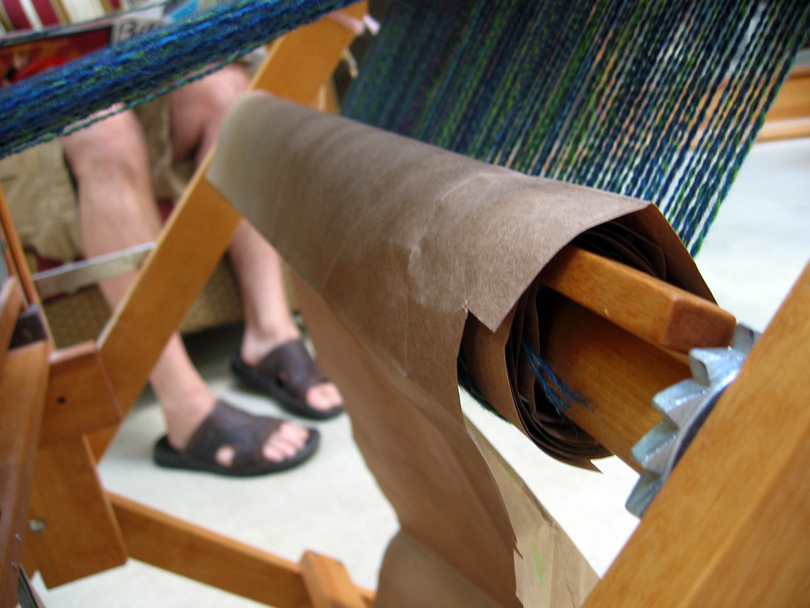
As I wind the warp on, I have to separate the layers of warp that are going onto the back beam. If I don’t, the warp threads will fall in between each other during the beaming, and this will cause uneven tension as I weave the warp off of the loom. There are a variety of things that can be used to keep the warp layers separate. For this loom, I use brown paper bags from the grocery store that I cut into long sheets. Free!

As I beam the warp on, the beater may start coming back to the shafts on the loom. This is usually do to one of two things:
- A choke tie need to be undone.
- The warp threads are tangled or stuck together somehow.
Either way, it needs to be taken care of. This is a good time to give an even pull across the width of the warp.
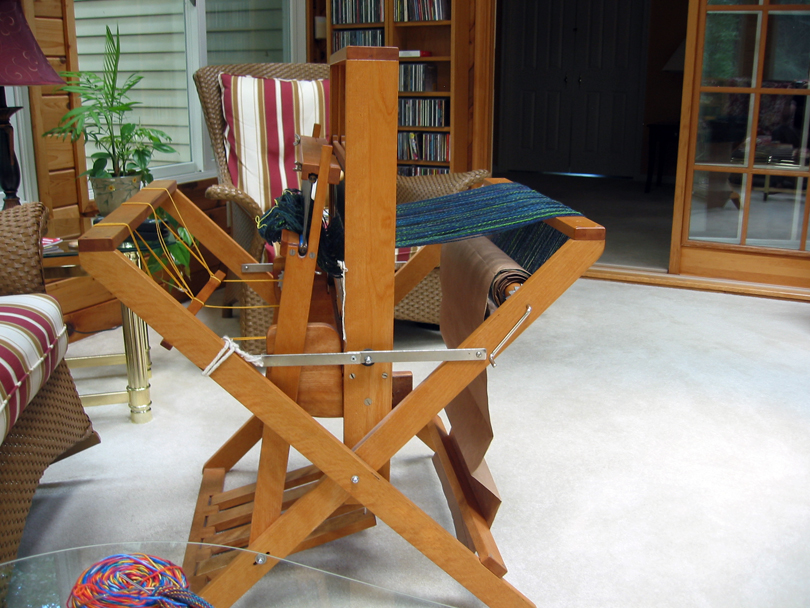
Eventually, all of the warp is wound onto the back beam.
V. Tie on to front and tension
I am so close to weaving now that I can almost taste it! The warp just needs to be tied onto the front beam and tensioned. (Note: At this point, the front to back warping method and the back to front warping method converge; and things are the same from here on out.)
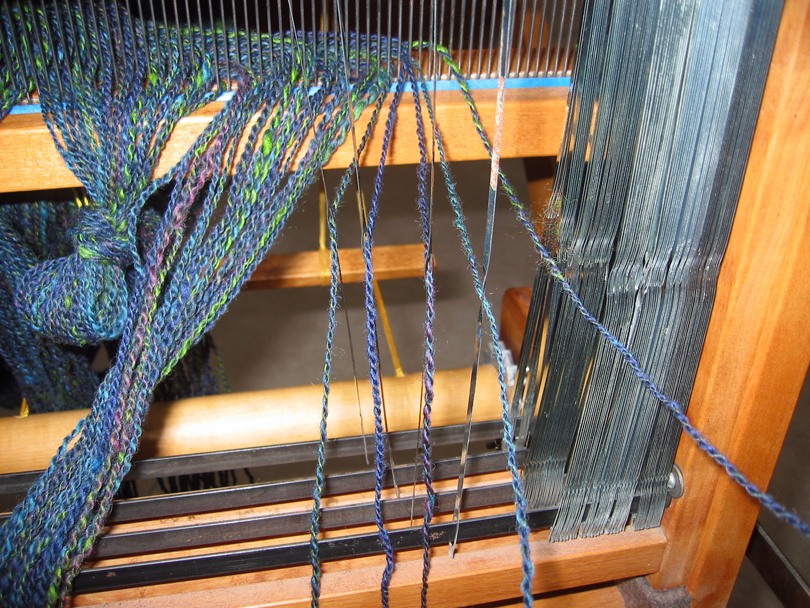
Here, I have taken off all of the choke ties, and have released enough of the warp to the front of the loom such that I will be able to easily tie it onto the front.
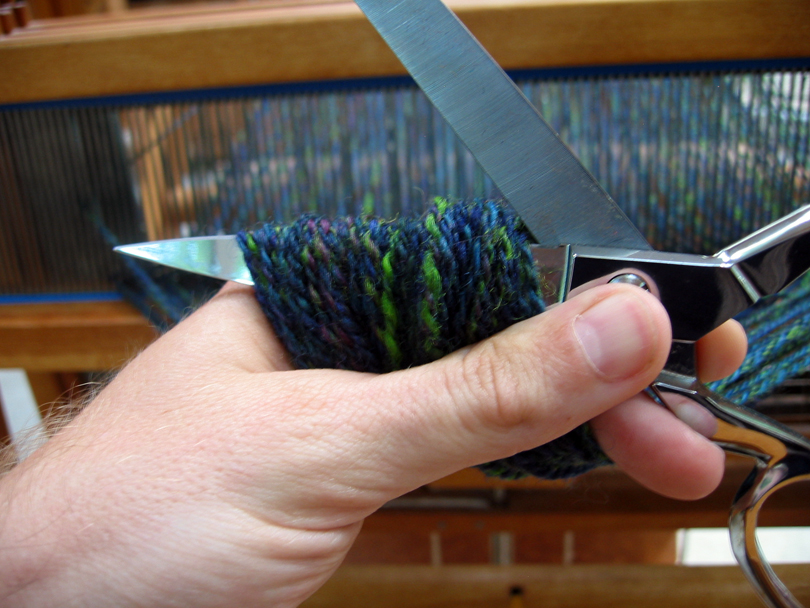
Snip!
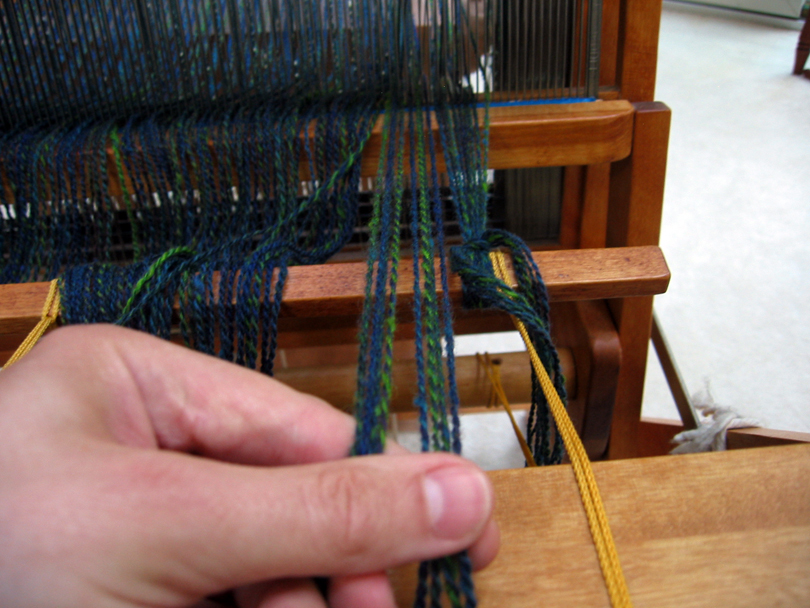
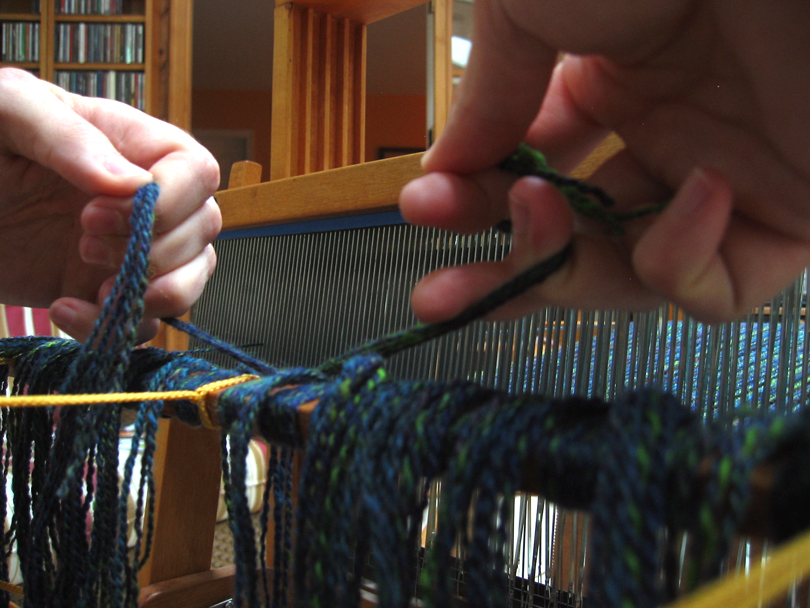
Alternating between sides of the warp, starting on the outside and working my way in, I take a small group of warp threads and “comb” them out with my fingers and get them to feel like they are at the same tension with each other.
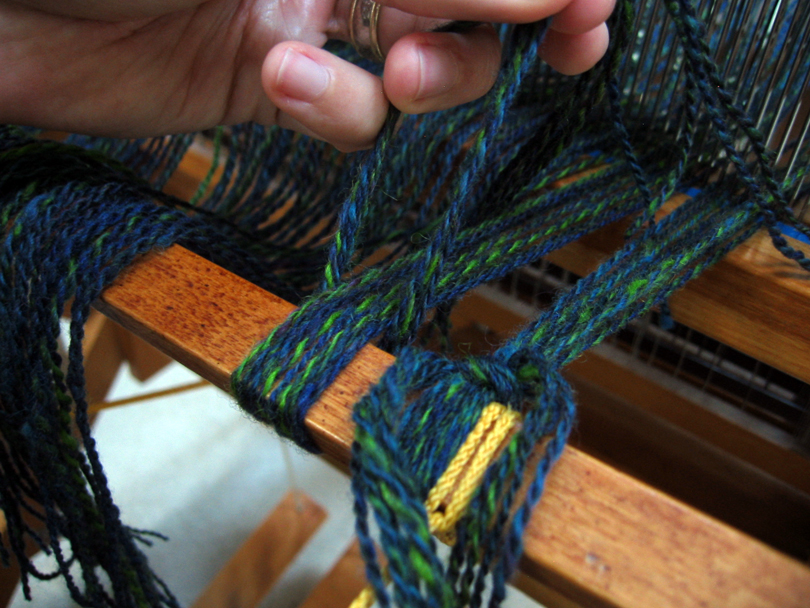
These threads are then wrapped around the rod that is attached to the front beam, wrapping them the same way that I did on the back beam.
A half square knot is tied to keep them in place while I do the next group of threads.
Again, working from side to side,
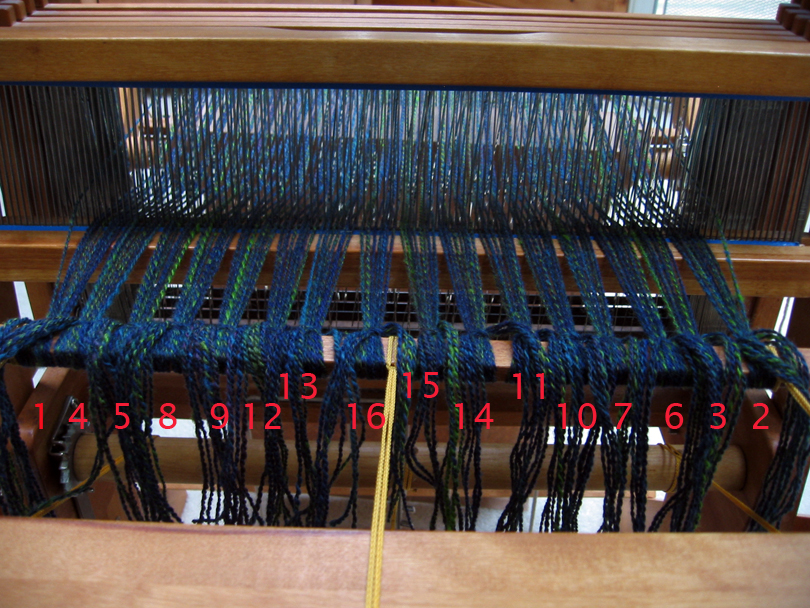
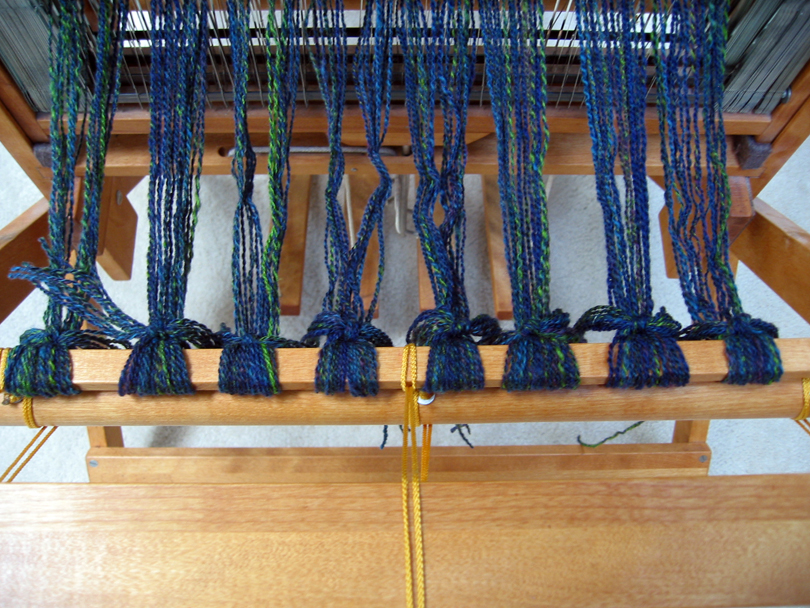
I get all of the warp threads tied onto the front of the loom. The numbers in red indicate the order in which I tied them.
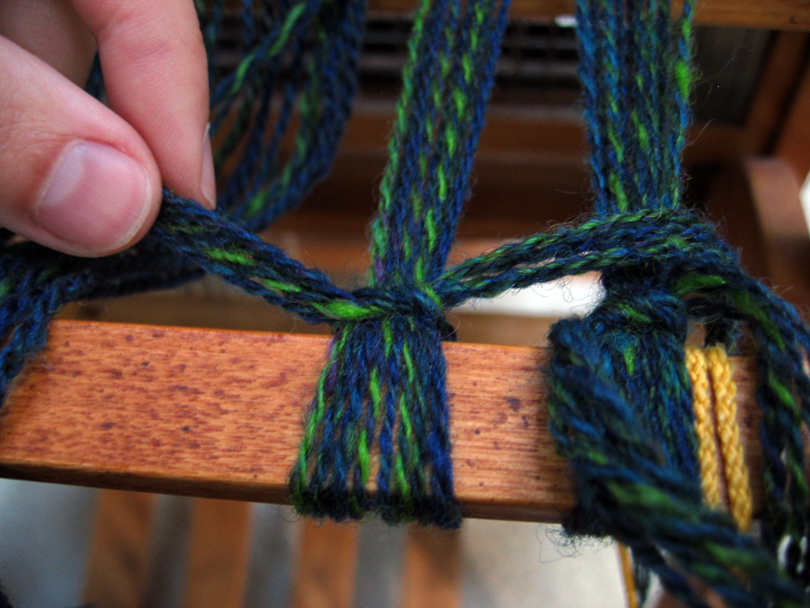
Now, in reverse order to which I tied the groups to the front, I tension the groups of threads to each other, starting at the center of the warp and working my way out. The reason for working in this order is that, as I worked my way into the center of the warp, the tension at which I tied the groups onto the loom probably increased, such that the warp threads at the center are at a higher tension than those at the sides, where I started.
With each group of warp threads, I pull the knot towards the loom until the group of threads feels like it is at the same tension as those thread groups around it.
When the thread group is at the tension that you think it should be, tie the other half of the square knot.
Working my way out to the edge of the warp, I now have a well tensioned warp on my loom.
Let the weaving begin!
Comments
4 responses to “(Sley) Ride”
Wow, this is so detailed. It’s interesting to see different approaches and processes. I appreciate all the work you put into this tutorial as well as the actual warping process!
Wow! I’ll have to remember this if Santa ever drops a loom (or a check) off at my house!! *grin*
And don’t worry. I told our professional dyer that I need to get a hold of some undyed yarn so that we could still have that dying party! *grin*
Thanks, Patrick! That is a great post, and it’s definitely going to help if I ever get my loom back out!
I don’t know about you, but I’m exhausted and I didn’t even do anything. Weaving is sooo involved, I appreciate your sharing all this with us lay people.