I joined up with the O-Loom-Pic Weave-along on Ravelry; so in doing the projects for it, I thought it would be a good opportunity for giving the uninitiated some insight into the weaving process. This post covers the project planning and winding the warp.
I grouped these two things together because it varies which happens first based on what I am making and what yarn I am using. If I am making something like towels or a project that is supposed to have a specific end result, the planning and calculations come first. If I am making something that is using a yarn that I have a limited supply of, like handspun or a special dye job, the winding of the warp comes first with just a vague idea of a project. In this case, the winding of the warp is coming first because I am starting two project, both with limited yarn supply. The yarn that you will be seeing this post is silk fingering weight from Dave Daniel’s Cabin Cove Yarn. I am going to make a scarf with it that will probably be between 5 to 6 inches wide.
By the way, before I get too far into this, this is just the way I do the warping and weaving. It is not the only way, by far. There are a lot of variables at play in how people do weaving: type of loom, how they initially learned to weave, how mobile they are, etc. Some people get very passionate about how others should weave. Me? Not so much. I just want to encourage you to weave. How? That is up to you.

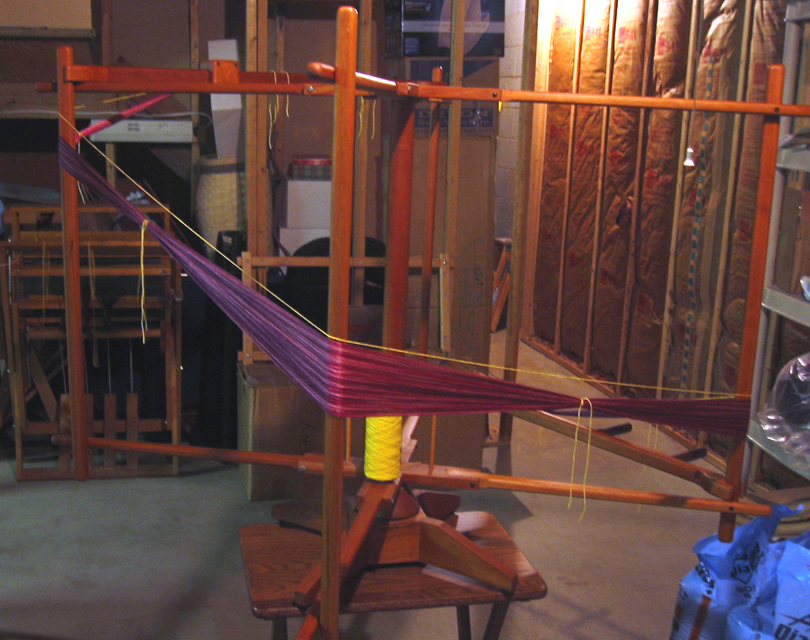
This picture shows my warping mill, which is the tool I used for measuring out the yarn that I am using as warp. The warp yarn is the yarn that is actually placed on the loom (or used to “dress” the loom.) It is the yarn that loom actually controls, while the weft yarn is the yarn that is up and down through the warp yarn. Which yarn is which will become clearer in future posts.
It might be difficult to see in the above photo, but there is a yellow thread running around the warping mill. This yellow thread serves as a guide for where I am going to place my warp yarn on the mill. The yellow thread is as long as I want the entire warp to be.
How long is that? The warp length is calculated by determining how long I want the finished woven fabric to be, add to that a percent to allow for take up (the yarn in the finished fabric will not be running in a straight line, but a wiggly path, over and under the weft yarn) and shrinkage from washing. Add to this value, the length of yarn that is called loom waste. Loom waste is warp yarn that will never be woven because the weaver just can’t get to it. This is the part of the warp yarn that is used to tie the warp onto the loom and as well as the warp yarn that never makes it to the front of the loom to be woven just because of the basic mechanics of the loom. (Again, this will become clearer in future posts.)
Now, do you need a warping mill to wind a warp? No. There are less expensive options. There are warping boards, warping pegs, etc. Basically, what is needed is three sticks, with two at one end of the length of warp and one at the other end. Turning a couple chairs over could do the trick for you, using the legs of the chairs as your warping pegs. The next couple pictures will hopefully show you why you need three sticks.
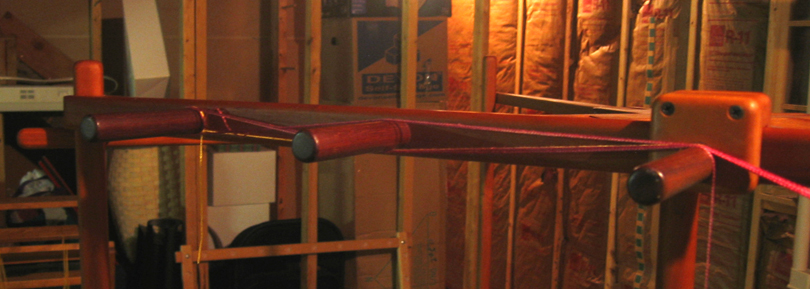
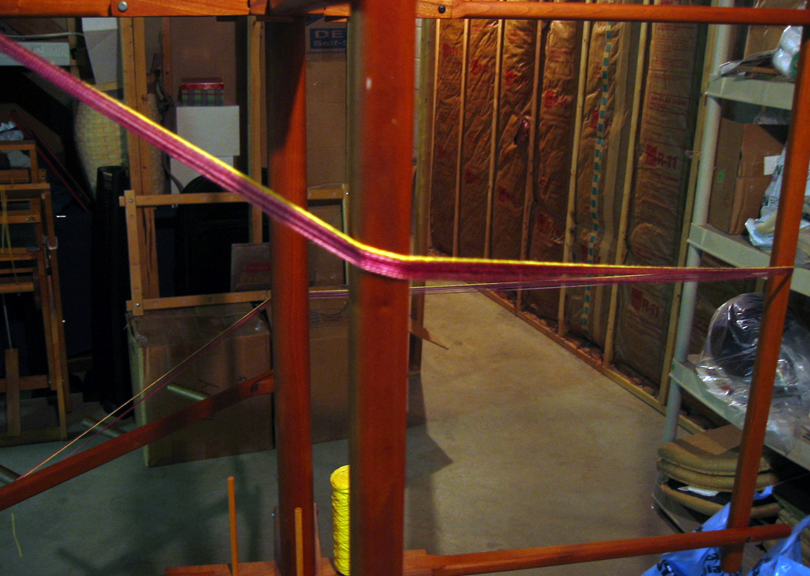
In the two pictures above, I am actually winding the warp onto the mill. As you see, the purple silk is following the path set out by the yellow guide thread. This basically amounts to making a big loop. The main difference is the cross that you see in the first of these two pictures. That cross is to keep the warp threads in a particular order that will be helpful to me when I am actually putting the warp on the loom. That is why you need to the two sticks at the beginning of winding the warp, so that this cross can be formed.
I’d also like to point out that each successive warp thread is laid under the previous warp thread on the mill. The warp threads are not just laid criss-cross over top of one another. There are two reasons for this:
- It is to help keep the warp from becoming a tangled rat’s nest. Taking care of this kind of stuff now will save me a lot of heartache later. An ounce of prevention….
- Doing this will help to make sure that all of the warp threads are consistent in length. Warps tend to be long. (This one is considered a short warp, and it is about four yards long.) Laying the warp threads on the mill like this will mean less waste in the long run.
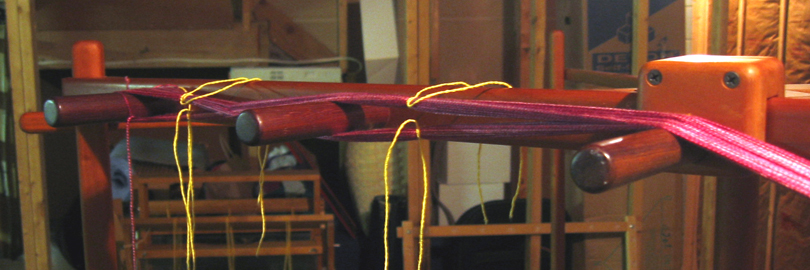
Once I am done winding all of the warp yarn onto the mill, it is time to tie choke ties onto the warp. Again, this is done so that I don’t end up with a big tangled mess with I try to take this yarn off the mill. Notice that I did a lot of these choke ties around the cross. This is so that I can easily find and use the cross in the next step.
Once all of my choke ties are in place, take the warp off of the mill by forming a warp chain. If you are familiar with the chain stitch in crochet, then you have a pretty good idea of what I am doing. I use my hand as the crochet hook, start at the one end of the warp (the opposite end from the cross), and chain the whole big group of threads off of the mill, working my way up to the cross. The end result is this:
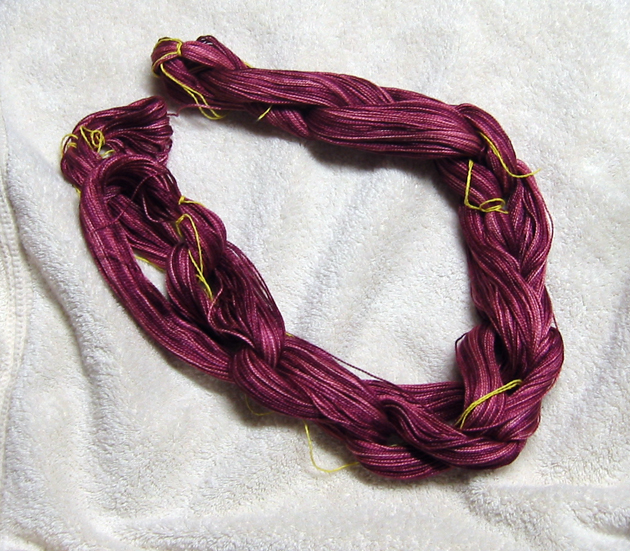
The very top of the picture shows where I started doing my chain; and if you work your way clockwise to the other end, you will see where I finished up the chain at the cross.
Now that I have formed the warp chain, I know how many thread are going to be in my warp (however many there are in the chain.) With this information, I can determine what kind of pattern I can weave and how wide I can make the scarf.
Something that spinners are familiar with, WPI (wraps per inch,) is something that weavers use all of the time. Wraps per inch is how many times a yarn can be wrapped around a something (like a pencil or piece of cardboard) within an inch space. When wrapping, the yarn is laid side by side, not criss-crossing with the other yarns because the purpose of this is to determine the diameter of the yarn.
From the WPI, the weaver calculates the EPI (ends per inch) for the warp yarn. How to calculate EPI from WPI is dependent on the weaver structure and the density of the cloth the weaver wishes to make. For example, to weave a plain weave (over one thread, under one thread) in a balanced weave (same number of threads in each direction,) the EPI is half the WPI of the warp yarn. For a balanced 2-2 twill (over two threads, under two thread,) the EPI is about two-thirds the WPI of the warp yarn. From there, EPI can be increased to create a denser fabric, like for rugs or upholstery, or can be decreased to create a more gauzy weave, like for lace.
Like I said at the start of this post, this is what I do when I kind of wing it. If I was making something like towels, blankets, or a rug, then I would do all of the planning and calculations first, determining the EPI, warp length, and how many warp threads I will need to make the desired width of cloth. When I do something like towels again, I will give you a better idea of what I mean.
Next, I will be dressing my loom. If there are any questions about what I am doing here, fire away in the comments.
Comments
4 responses to “Begin the Beguine”
I love the color of your Cabin Cove silk, Dave is one of my favorite dyers. I took a rigid heddle weaving class, but I didn’t find it too exciting. I appreciate all the detail in your blog and look forward to seeing more.
I am glad you are posting about weaving. It may get me going again!
Thank you for the detailed look at how you do your prepping. I learned me some stuff here. 🙂 Thank you
And, yes, you’ve inspired me to weave. Loom is on order. Website is built. Yarns are being spun. I’m just about ready!
My gods that’s a ton of work! I think I’ll stick to knitting and spinning and admiring the efforts put into weaving by others. 😀