Well, I must admit, sewing in the zipper for the sweater was my biggest dread for Mr. Penney’s sweater; but two things got me to do it:
- It was never going to be done until the zipper was finally in, and
- No matter how badly I did it, it could be taken out and done again, with the only thing being lost is time.
Initially, my plan was to use my sewing machine to sew in the zipper. Fortunately, I decided to try my “skill” with a test swatch I made to see how the yarn would wash and an extra zipper I had.
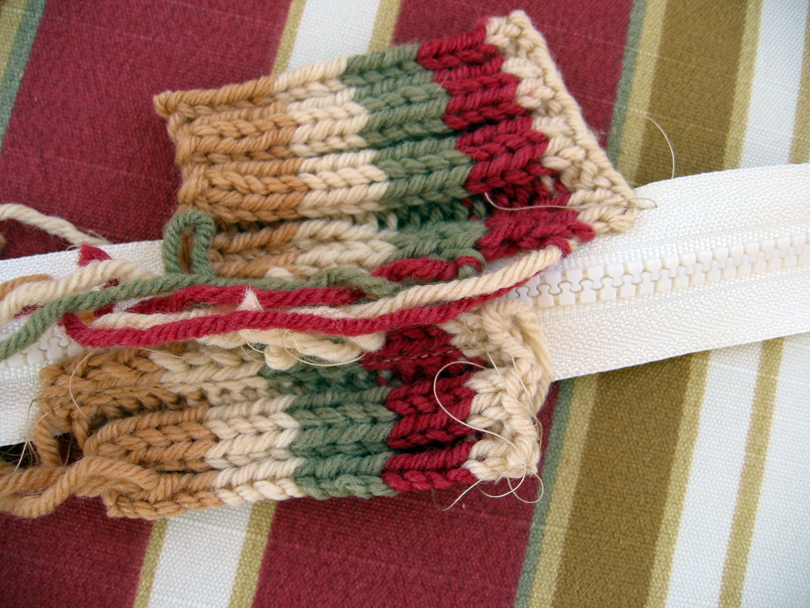
Using the sewing machine seemed to stretch out the knit. I blame this on my skill (or lack there of) with the sewing machine, as I have always worked on wovens and not knits with it. This, however, meant I had to find another way.
I did some searching on the Internet and found some good information. What follows is what I did and why I made the decisions I made with this. This doesn’t mean that it is right. It just means that this is what I did. Follow at your own risk.
- I started off by sewing the two fronts together. Actually, I did this before I even did the seaming, as I did it before I did the sewing with the test swatch.

I just used the sewing thread to do this. The main purpose was to match up the patterns and make sure everything was even before putting in the zipper. - I turned the sweater inside out and placed the zipper where the two fronts meet. Once I got the zipper in place, with the bottom of the separating zipper at the bottom of the sweater, the next step was going to be basting, so I slide a thin book inside the sweater, so that I would not accidently sew the front of the sweater to the back of the sweater.

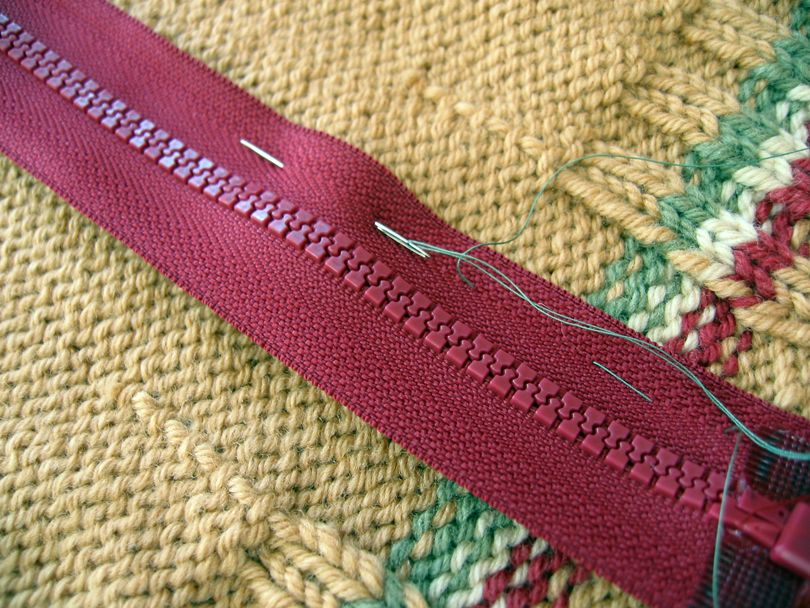
- To baste the sweater into place, I just did a running stitch on either side of the zipper, making sure to keep the teeth of the zipper over where the fronts meet.

I chose this method over the tape because I was unsure about how the adhesive of the tape would wash out and possibly migrate through the rest of the sweater. I chose basting over straight pins because straight pins would distort the fabric and the zipper, possibly causing some kind of misalignment. Besides, I already have the needle and thread out to do the sewing.
- Once the zipper was completely basted in place, I picked out the stitches that kept the front pieces together and checked that the zipper looked ok and centered.

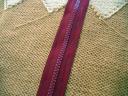
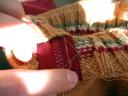
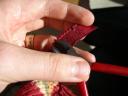
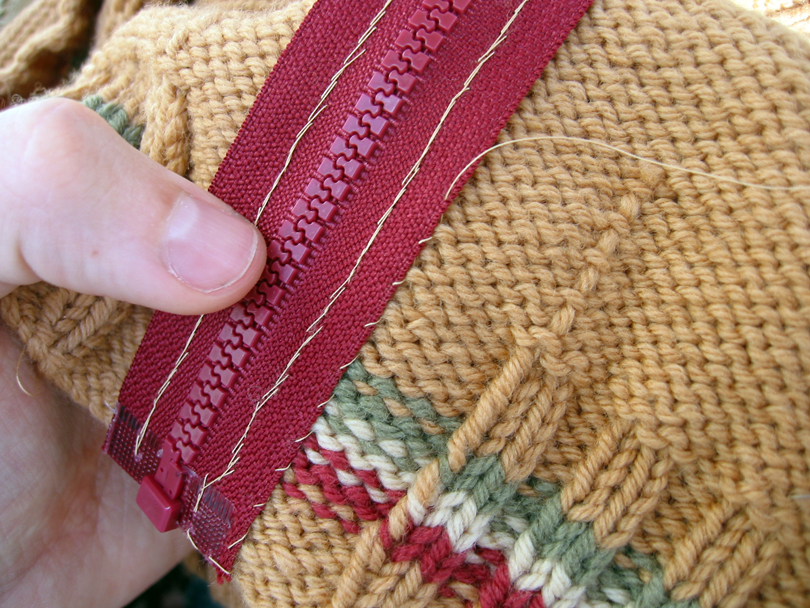
- Next, is the backstitching. This is what took forever. For an explanation of the stitch, go here. It is a fairly simple stitch that I used to do all of the time back when I used to do counted cross-stitch, but it is a lot easier to see the stitch on aida cloth or hardanger than it is in on a knit where the backstitch is falling into the columns of stitches.
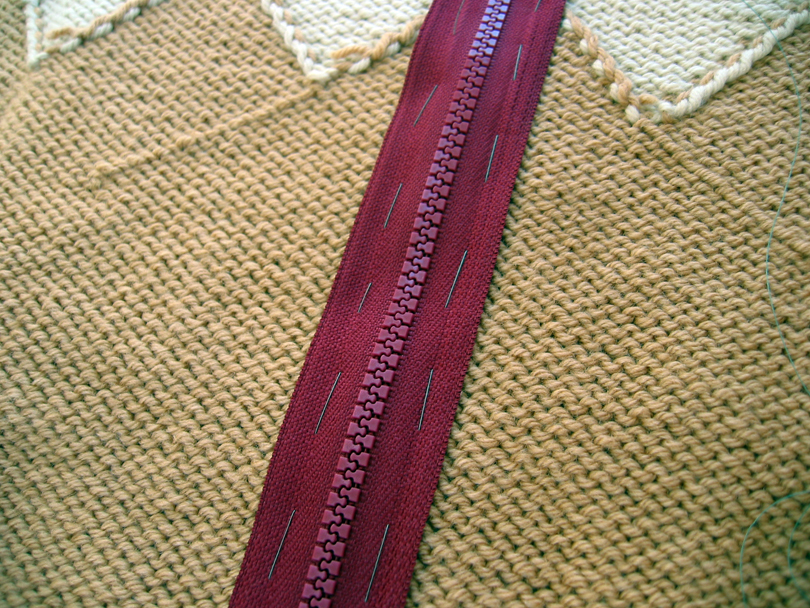
Here is the back side of the stitch.
In hindsight, I should have done the stitching completely in the color that matches the zipper rather than try to match to the yarn of the sweater. But for these pictures, it is actually rather helpful.
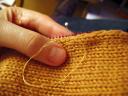
Eventually, I figured out that I should just move a pin along the front of the sweater, indicating where the needle should come up the next time, rather than searching in vain for the previous stitch by bending and folding the knit.
(I did try to take pictures of the right side of the stitch, but none of them came out right.)
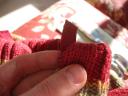
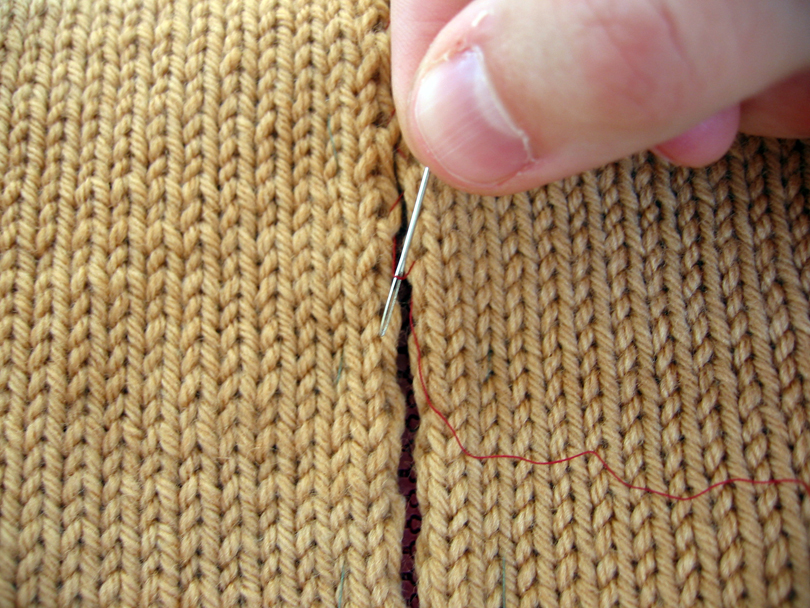
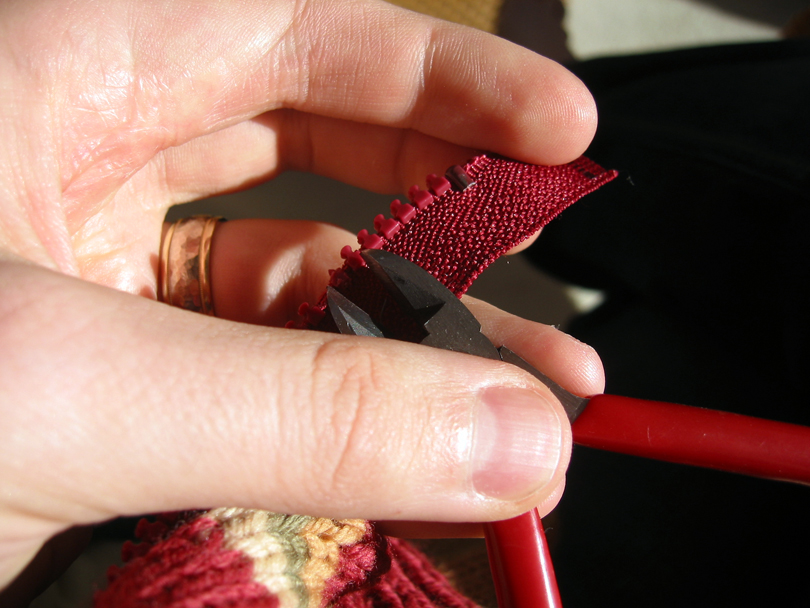
I started doing the stitching with the zipper completely closed; but once I got a few inches in, I opened up the zipper so that the process wouldn’t be so unwielding. - It turns out that I had to shorten the zipper. I should have done this before I even started sewing in the zipper, but I was a bit anxious and jumped the gun. Based on the information I found, I cut off the teeth of the zipper (which is a molded zipper, rather than a coil zipper) once most of the backstitching was done (up to the red on the sweater.)
(I didn’t actually operate the wire cutters like this. The other hand was on the camera.)
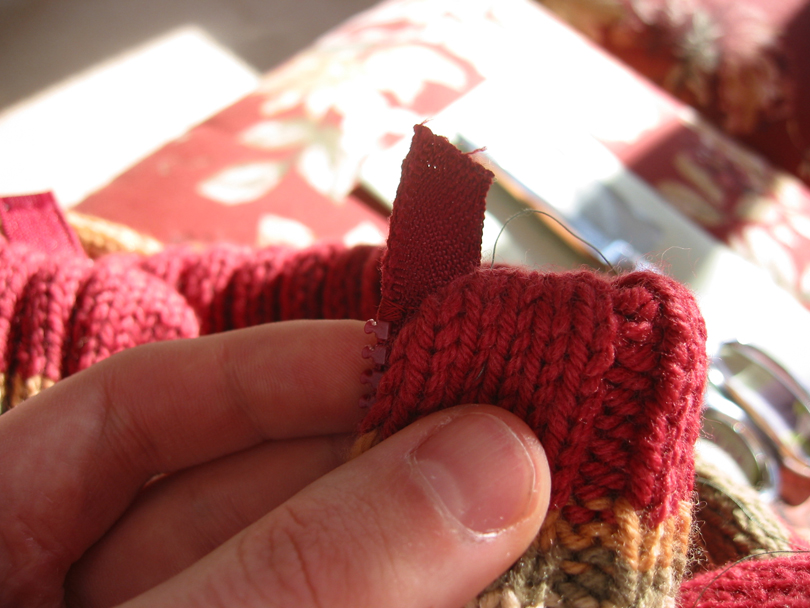
When all of the teeth were off of the zipper tape that needed to be taken off, I did a number of stitches just beyond the last tooth to serve as the zipper stop.
This end could now be tucked into the collar and I finished the backstitching. - With all of the backstitching done, I did a whip stitch to get the edge of the zipper tape to stay on the front of the sweater. I don’t want the zipper tape to fold at the line of backstitches over time and washes, so I hope this to keep the edge of the zipper tape in place.


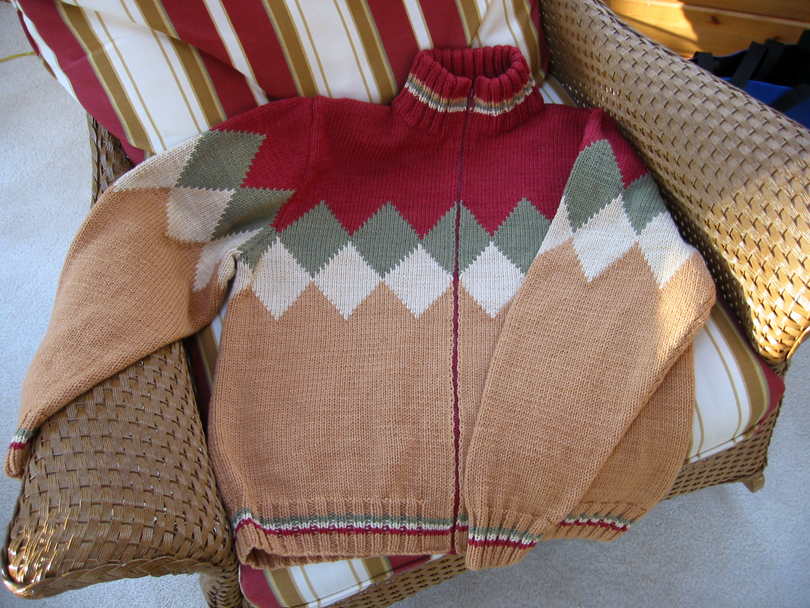
Once that was done, I was done!
Just some other notes on this:
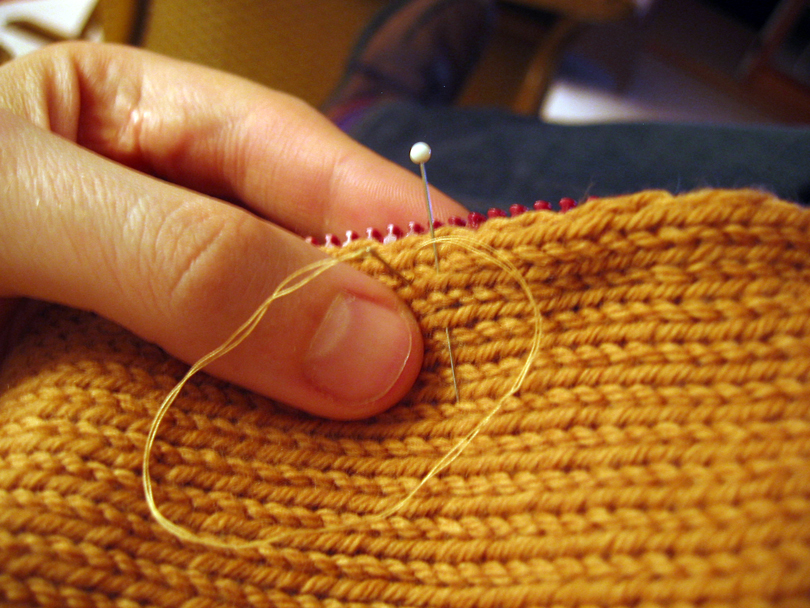
- I used a tapestry needle to sew in the zipper. Tapestry needles are blunt, which worked fine on every part of the zipper but the very bottom, which has a plastic covering. I pierce the covering with a straight pin to get a hole for the needle to go through.
- I did not knit a facing for the zipper because I feared it would create too much bulk at the front of the sweater, at least with the weight of the wool for this sweater.
- The 2×2 ribbing stops about an inch on each side of the opening for the zipper, with just stockinette in its place, so that the zipper could be sewn in on a flat fabric.
- To get the slip stitch edges on the front to meet up right, the left half was knit “backwards.” After casting on for the left front, I broke the yarn and started knitting at the other end. (I used circular needles.) For the main body, the odd rows were purl rows and the even rows were knit, rather than the other way around, which is normally done for stockinette.
If there are any questions, please ask. I know that I don’t always explain things in the most effective ways. If I could do this blog by pointing and grunting, I probably would!
Comments
6 responses to “Zip-A-Dee-Doo-Dah”
It came out so perfectly!
Thanks for the detailed post – I’d decided I wouldn’t try mine until I saw yours. I feel a little more confident now…
Wow! That looks wonderful! Thanks for the tutorial too. I have always been intimidated by zippers. Ever since home-ec class in 7th grade.
Happy New Year too.
That is one gorgeous sweater! Bravo!
Thank you so much for all the zipper detail, I know I will read it again when I have a zipper to install. I appreciate all of your helpful hints.
Thanks so much for the zipper tutorial! This will definitely come in handy whenever I decide to tackle a zipper sweater and it’s helped me overcome some of my fear for them. 🙂
[…] as you know how to sew in a zipper in a fabric garment I did it the same start to finish. Just like Patrick’s […]